Can You Extract and Reuse High-Clay Soil in Another Location?
Yes, you can often extract and reuse high-clay soil elsewhere on your property. Clay is not automatically poor soil; it is dense, fine-textured soil that holds water and nutrients well. Whether it is useful depends on where you place it and how you handle it.
Moved clay can work for reshaping a yard, building berms, filling shallow depressions, or forming the base of a landscaped area. It may also support an in-ground planting bed after preparation. It is less suitable for locations needing fast drainage, such as containers, patio bases, or beds for plants that dislike wet roots.
Treat excavated clay as site material rather than finished garden soil. Keep clean layers separate, avoid working it wet, test it if its history is uncertain, and match it to an appropriate use.
Decide Whether the Clay Soil Is Suitable for Reuse
High-clay soil is usually worth saving if it comes from a clean part of the yard and you have a suitable destination for it. Before moving it, consider:
- Is it clean and free of likely contaminants?
- Which layer is it? Dark topsoil and dense subsoil behave very differently.
- What must it do in the new location? Support plants, raise grade, fill a low area, or form a compactable base?
Clay may be sticky when wet, hard when dry, and slow to drain. Those traits can be useful for fill and grading but frustrating when spread directly into a vegetable bed without improvement.
Match the Soil to Its New Purpose
| New use | Is high-clay soil suitable? | What it needs |
|---|---|---|
| Filling shallow low spots | Usually, yes | Place in layers, firm moderately, and cap with topsoil if planting |
| Grading or shaping a berm | Yes | Keep slopes gradual and direct water away from buildings |
| Underlayment beneath landscape areas | Often | Avoid blocking drainage paths or creating wet pockets |
| Lawn establishment | Sometimes | Loosen the surface and add topsoil or organic matter as needed |
| Shrub and perennial beds | Often | Improve the whole planting zone |
| Vegetable gardens | Possible, but requires work | Improve structure, drainage, and organic matter |
| Containers and raised planters | No, not directly | Use a proper potting mix |
| Drainage-sensitive construction areas | Usually not alone | Follow project specifications and local requirements |
Clay-rich soil is useful for stable grade changes and is less likely to wash away than loose sand. However, bare clay can erode or form a sealed surface in heavy rain, so protect slopes with mulch, seed, planting, or erosion-control material.
When High-Clay Soil Should Not Be Reused
Do not reuse soil casually if it may be contaminated or biologically risky. Soil near old structures, workshops, driveways, fuel storage, treated timber, burn piles, or spill sites may require professional assessment.
Also avoid moving soil from areas with:
- Persistent soil-borne plant diseases, root rots, wilts, clubroot, or nematode problems
- Aggressive invasive weeds spread by roots, rhizomes, bulbs, or seed
- Construction debris, glass, asphalt, painted material, or excessive rubble
- Salty soil, unusual odors, or visible chemical residues
Spreading suspect soil thinly does not eliminate the risk; it may simply spread weeds, pathogens, or contaminants to healthy areas. Soil from around diseased plants may be suitable only for non-growing uses, such as fill beneath a path, and should not be placed around susceptible plants.
Test and Plan Before Excavating
Planning prevents the common problem of creating a large stockpile with nowhere suitable to use it.
Clay soil usually feels smooth and sticky when moist, forms a ribbon when pressed between thumb and finger, and dries into hard clods. Many soils are mixed, however, so a texture test can help confirm whether the material is clay-heavy.
Inspect the excavation area after rain. Note where water stands, how long it remains, and whether the ground becomes slick or rutted. Check a test hole for soil layers: the upper dark layer is usually topsoil, while lighter, denser material below is often subsoil. Plan to save them separately.
Estimate volume before digging:
length × width × average depth = cubic volume
Excavated soil expands when loosened, so stockpiles occupy more space than soil in the ground. Leave room for piles, equipment access, and covers.
Check for Contamination, Disease, and Invasive Weeds
Order testing when site history is unknown or concerning. A standard garden fertility test can measure pH and nutrients, but it may not screen for contaminants. Ask the testing service for the appropriate test.
Be especially cautious when moving soil onto an edible garden, children’s play area, or pollinator planting. Soil acceptable as deep fill may not be suitable at the surface where people grow food or work regularly.
Inspect for invasive weeds before excavation. Seedheads, creeping roots, tubers, and rhizomes can all be transported with soil. Avoid using infested soil in cultivated beds; containing it or using it only in a controlled non-planted area may be safer.
Test Drainage, Structure, and Nutrient Needs
Drainage is a major limit of clay soil. In the proposed planting area, dig a hole, fill it with water, let it drain, refill it, and observe how long water remains. This simple test is not a full drainage assessment, but it can reveal likely root-zone problems.
Healthy clay does not need to be loose, but it should break into crumbly aggregates rather than solid slabs. Gray, sour-smelling layers suggest poor aeration, while hard clods and deep equipment tracks suggest compaction.
For planting areas, test pH and nutrients after the soil has been placed and settled. Texture alone does not reveal fertilizer needs, and clay often retains nutrients well.
Excavate, Store, and Transport Clay Soil Properly
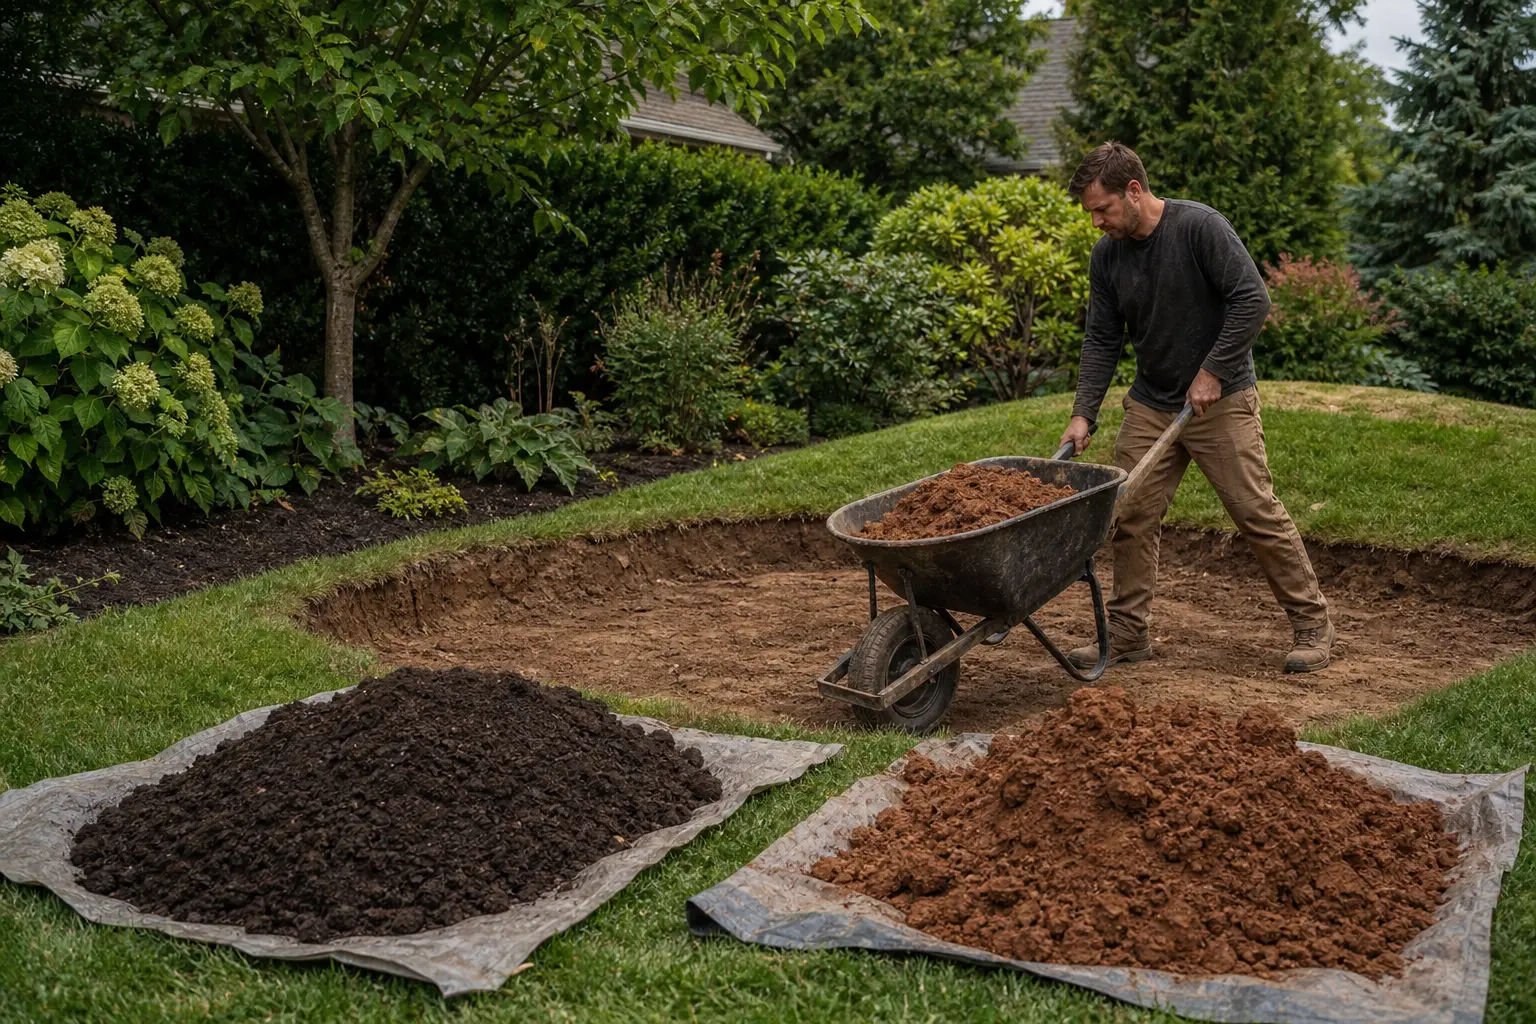
How you handle clay determines whether it remains workable or becomes compacted clods. Mark separate stockpile areas before excavation. Strip and store topsoil first, then excavate subsoil or fill separately. If machinery is involved, minimize travel over soil you intend to save.
For small projects, place soil on tarps rather than directly on lawn or paving. This reduces cleanup and limits sediment runoff.
Avoid Moving Soil When It Is Too Wet
Do not excavate or spread clay when it is saturated, easily smeared, or sticky enough to form a shiny ribbon. Machinery can knead wet clay into dense layers that water and roots struggle to penetrate.
Squeeze a handful as a field check. If water glistens on the surface, it smears across your hand, or it forms a smooth sticky mass that will not crumble, wait for drier conditions. Slightly moist—not wet—soil is usually best for excavation and grading.
Very dry clay can also be difficult because it forms large, hard clods.
Keep Topsoil, Subsoil, and Fill Material Separate
Topsoil is generally the most valuable layer for gardens and lawns because it contains more organic matter, roots, and biological activity. Subsoil is usually denser and lower in organic matter. Mixing them creates a larger quantity of mediocre material while wasting the best surface soil.
A practical system is:
- Pile 1: Topsoil for planting beds and lawn surfaces
- Pile 2: Clay subsoil for grading, berms, and deeper fill
- Pile 3: Debris or questionable material for disposal or separate evaluation
Avoid burying topsoil beneath dense clay. The upper layer should be the most fertile and workable material whenever possible.
Cover Stockpiles and Limit Storage Time
Cover stockpiles if rain is expected, particularly on sloped ground. A secured tarp reduces runoff and erosion. Larger projects may need temporary silt fencing or a berm to keep sediment out of drains and neighboring property.
Avoid excessively tall piles, which compact under their own weight. Use soil as soon as practical. If a pile will remain for more than a season, control weeds before they seed.
Prepare High-Clay Soil for Its New Location
Spread clay in lifts rather than dumping one deep mound and expecting it to settle evenly. Thin layers are easier to shape, stabilize, and assess.
Before placing soil in a planting area, loosen compacted ground beneath it if drainage allows. A sharp boundary between loose soil and compacted clay can trap water. Shape the finished surface so it does not leave a basin around a foundation, walkway, or planting bed unless it is intentionally designed as a rain garden.
Reuse Clay Soil for Grading, Berms, and Fill
Clay subsoil is often best used for earth shaping rather than as the final growing medium. It can fill minor depressions, build contours, and form the core of a berm.
For a low spot:
- Remove turf or loose debris if needed.
- Add clay in shallow layers.
- Firm each layer enough to reduce settlement.
- Shape the area slightly above surrounding grade.
- Add suitable topsoil if it will be planted or seeded.
Do not use clay fill to solve drainage problems without identifying where water will go. Raising one area may redirect runoff toward a building, driveway, or neighboring yard. Seek site-specific advice for deep fill or work near foundations, utilities, or drainage systems.
Improve Clay Soil for In-Ground Planting
Clay can become productive garden soil, but improvement is gradual. The goal is better aggregation, root penetration, and water movement.
Spread finished compost or other stable organic matter over the entire planting area and work it into the upper layer when the soil is workable. Repeated light applications over several seasons are generally more useful than one extreme amendment effort. Compost supports soil life and helps clay form more workable crumbs.
Avoid adding a small amount of sand to heavy clay. Unless a large, carefully calculated proportion is mixed evenly, it can create a dense, cement-like material. Compost, leaf mold, aged manure, and organic mulches are generally better choices.
For trees and shrubs, avoid creating a richly amended “bathtub” in dense native clay. Water can collect in the loosened hole if surrounding soil drains slowly. Plant at the correct depth, widen the planting area, loosen the surrounding surface, and mulch over the root zone.
Do Not Use Heavy Garden Clay Directly in Containers
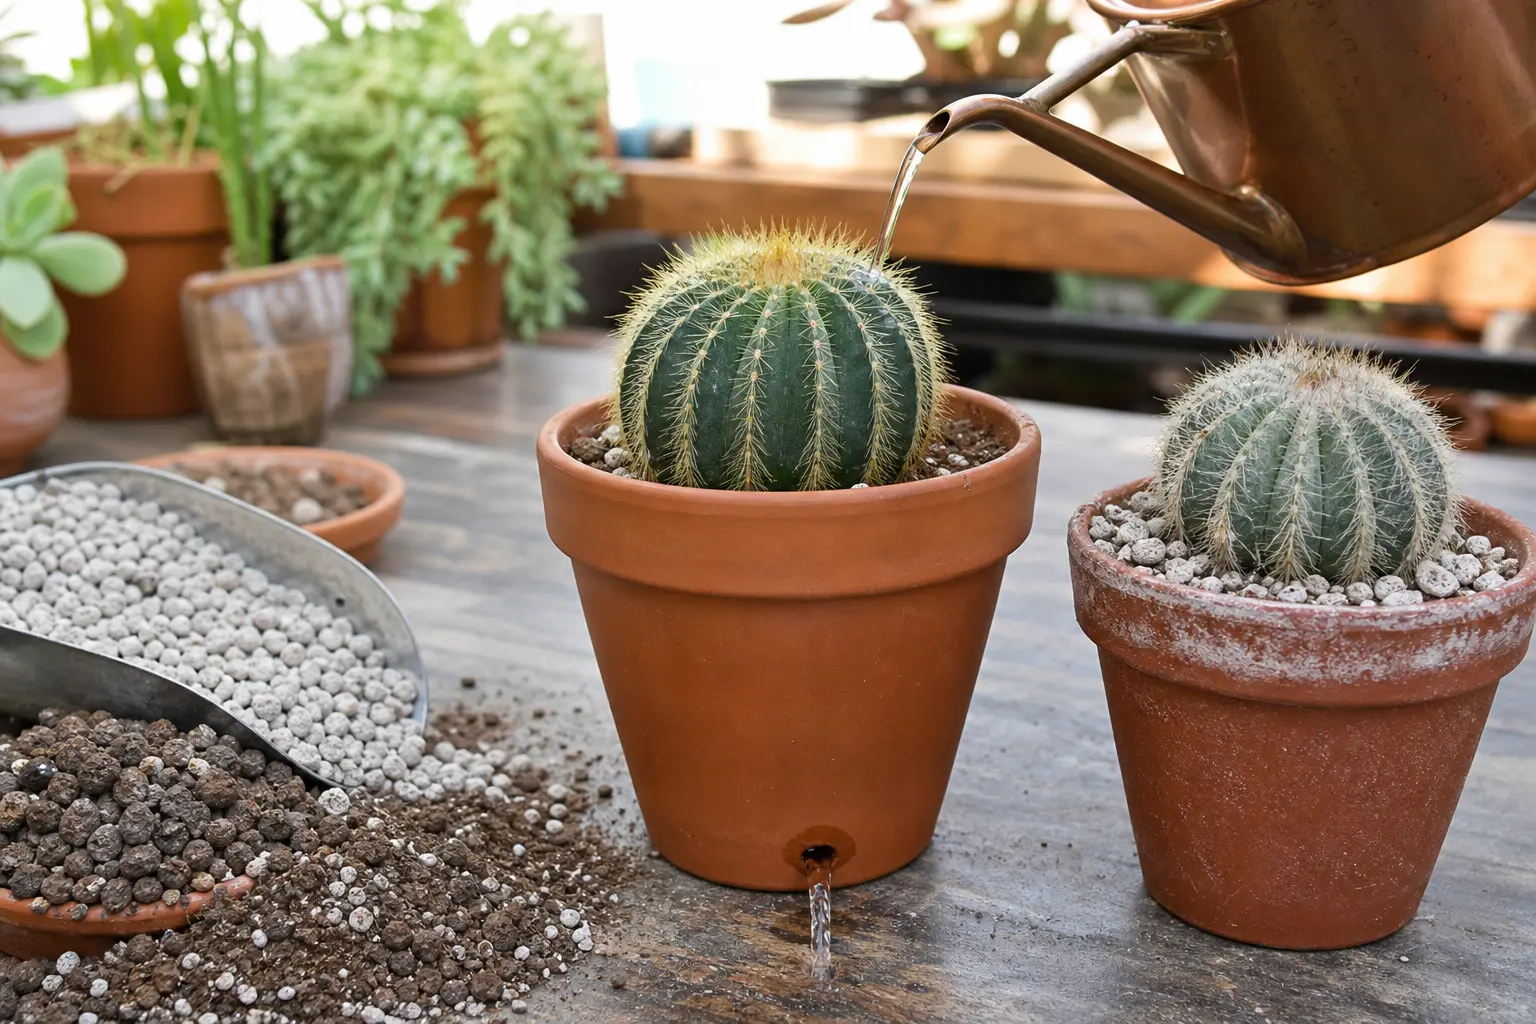
Do not fill pots with reused yard clay. In containers, it compacts easily, drains slowly, and leaves too little air space around roots. It may become waterlogged or dry into a hard mass that water cannot penetrate easily.
Use a potting mix designed to hold moisture while maintaining air-filled pore space. For most containers, a purpose-made potting medium is the reliable choice.
Manage Drainage and Compaction After Relocation
Moved clay often behaves differently from undisturbed clay because excavation disrupts layers and machinery may compact it. Check the new area after substantial rains. Ponding, runoff channels, or persistently soft ground indicate that adjustment may be needed.
Do not fix every wet patch by adding more soil. First determine whether the problem is surface grading, roof runoff, compaction, blocked drainage, or naturally slow subsoil drainage.
Grade the Site to Move Water Away
Finished ground should direct water away from buildings and avoid trapping it against fences, paths, or planting borders. A smooth, continuous slope works better than a surface full of shallow dips.
Rake or grade clay before it dries into hard ridges. Protect bare soil with mulch, seed, planting, or erosion-control material. Rain on exposed clay can seal the surface, increasing runoff and reducing infiltration.
Where drainage remains poor, consider using moisture-tolerant plants rather than forcing the area to act like a dry border. A swale, rain garden, or designed drain may help in some cases, but it needs a safe outlet and must not direct water toward structures.
Add Organic Matter Appropriately
Organic matter helps clay planting areas but is not an instant drainage cure. Compost can improve aggregation and biological activity over time, especially when paired with reduced compaction and mulch.
Apply compost across the bed rather than only in planting holes. Maintain progress with annual top-dressing and mulch. Avoid repeatedly rototilling clay into powder, which can destroy aggregates and create a crusting surface. Work soil only when moisture is suitable.
Use Plants Suited to Clay Conditions
Plant selection makes reused clay easier to manage. Choose plants that tolerate moderate moisture and heavier ground, especially in low areas where water lingers.
Many established shrubs, native perennials, and tough lawn grasses can adapt to clay. Plants needing sharp drainage, including many Mediterranean herbs, rock-garden plants, and drought-adapted succulents, are better in raised beds, gravelly soil, or containers.
Even clay-tolerant plants need correct planting depth and a prepared surface layer. Mulch moderates moisture swings, reduces crusting, and protects soil from heavy rain.
Conclusion
You can reuse high-clay soil elsewhere if it is clean, suitable for the purpose, and handled carefully. Save topsoil for the surface, reserve dense subsoil for grading or fill, and avoid moving clay when it is saturated.
For planting, improve the upper layer gradually with organic matter, mulch, and clay-tolerant plants. For grading and berms, focus on stable placement and drainage. Do not use heavy garden clay directly in containers or transfer soil that may carry contaminants, invasive weeds, or serious diseases.
FAQ
Can you move clay soil from one yard to another?
Yes, if the soil is clean and local rules allow it. Keep topsoil and subsoil separate, avoid transporting invasive weeds or diseased soil, and move clay when it is moist enough to handle but not wet and sticky. Test soil with an uncertain history before spreading it in edible gardens or play areas.
Is high-clay soil good for filling low spots?
High-clay soil can work well for shallow low spots because it is stable and easy to shape. Apply it in layers, allow for settling, and ensure the finished grade sends water to a safe location. Add topsoil if you plan to grow turf or ornamentals.
Can compost improve reused clay soil?
Yes. Finished compost can improve structure, root growth, and workability over time. Spread it over the whole planting area and incorporate it lightly when conditions are suitable. Continue with mulch and periodic top-dressing rather than expecting one application to solve deep drainage or compaction problems.
Can soil from a diseased plant be reused elsewhere?
It depends on the disease, but it is safest not to move soil from around plants with unexplained or persistent root, wilt, or soil-borne disease problems. Reusing it around susceptible plants can spread the issue. If you cannot identify the disease, keep that soil out of garden beds and use caution even in ornamental areas.
You Might Also Like