Can You Use Compost Activator in Old Potting Soil?
Yes, you can use a compost activator in old potting soil, but it is only a small aid—not a complete solution.
An activator may help microbes break down fine roots and organic remnants from the previous crop when the mix is warm, lightly moist, and aerated. It will not replace nutrients, reverse compaction, remove salts, or restore the airy structure container plants need.
To reuse old potting mix, remove debris, assess its condition, and use an activator only if organic material remains to decompose. Then refresh the mix with fresh potting soil, finished compost, and fertilizer suited to the plants you plan to grow.
What Compost Activator Can—and Cannot—Do in Used Potting Mix
Compost activators are intended to encourage decomposition. Depending on the product, they may contain nitrogen-rich ingredients, microbes, enzymes, or similar materials that support microbial activity.
In old potting soil, an activator can help when the mix is:
- Slightly moist, not dry or saturated
- Loose enough for air to move through it
- Kept in reasonably warm conditions
- Filled with fine roots, dead leaves, or other organic remnants
It is not a substitute for fresh growing media or fertilizer. Plants use nutrients, and watering leaches soluble nutrients through drainage holes. Peat- and coir-based mixes can also lose their springy texture, becoming dense or water-repellent.
Think of an activator as a cleanup aid for organic leftovers. It does not recharge old potting soil by itself.
What happens to old roots and plant debris
Fine roots left behind after removing a plant will gradually decompose. Under good conditions, fungi, bacteria, and other decomposers break down thin roots fairly quickly. Thick roots, woody stems, and large root balls take much longer and are best removed before reuse.
Small root remnants are usually harmless and do not need to be picked out completely. Large root masses, however, can make the mix uneven, reduce drainage, and hide compaction problems.
If the previous plant was healthy, fine roots are generally normal in reused potting soil. If it had suspected root disease or persistent pests, avoid reusing the mix for sensitive plants.
Why decomposition is slow in a container
A pot is not a compost pile. Compost works best with varied organic materials, moisture, air spaces, and active decomposers. Used potting soil often has little fresh organic matter and may be too dry, cold, or compacted.
A pot left empty over winter may freeze, dry out, or become soaked with rain, all of which slow decomposition. Adding activator to dry soil in a cold garage is unlikely to make much difference. The mix needs moisture, oxygen, and time.
When an activator is unlikely to make a noticeable difference
Skip the activator, or do not expect much from it, when:
- The mix contains few organic remnants
- You have removed nearly all roots and debris
- The mix is dry and will not be kept lightly moist
- Conditions are cold and you need to plant immediately
- The soil is severely compacted, muddy, or broken down
- The old pot held a diseased plant or recurring pests
- You expect the activator to provide nutrients for a new crop
Fresh potting mix, finished compost, drainage materials, and fertilizer will have a greater effect in these situations.
How to Use Compost Activator With Old Potting Soil
If the potting soil came from healthy plants and still feels reasonably open and crumbly, prepare it for reuse over several weeks. This is easiest at the end of the growing season, when there is time for remaining roots to break down before spring planting.
Remove large roots, stems, and undecomposed material first
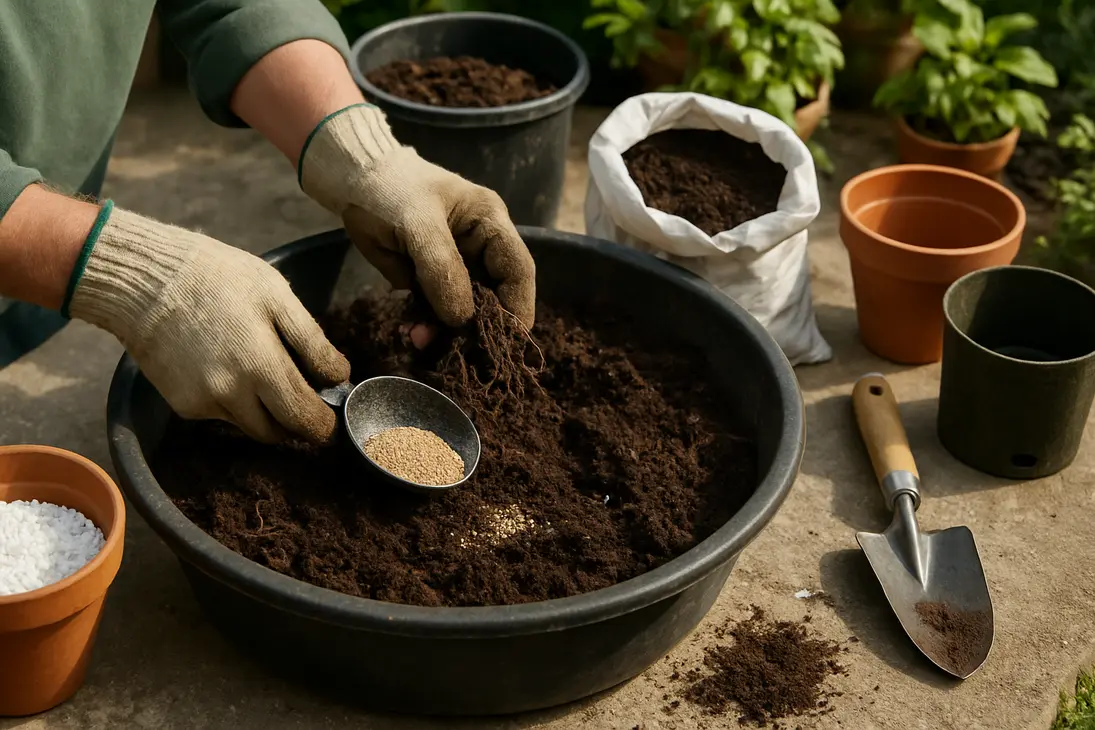
Empty the container onto a tarp, tray, or bin. Break apart compacted root balls and remove:
- Thick roots and woody stems
- Large leaves or mulch pieces
- Plant labels, ties, and other non-compostable debris
- Visible pest clusters
- Material showing mold from rotting, waterlogged conditions
Screening through a coarse soil sieve is optional. For most home containers, hand-removing the largest pieces is enough.
Do not try to make the mix perfectly root-free. The goal is to remove slow-decaying material and anything that interferes with texture.
Moisten, aerate, and mix in the activator as directed
Loosen dense clumps and add water gradually until the mix feels like a wrung-out sponge: damp but not dripping.
Mix in the activator according to the label. Do not assume more product will work faster. Excess nitrogen-containing activator can contribute to odor or salt problems in a small volume of potting mix.
Store the moistened mix where it can breathe, such as a ventilated tote, fabric grow bag, open bucket protected from rain, or covered bin with air holes. Stir it occasionally to redistribute moisture and oxygen.
Let the soil rest and check progress before planting
In warm conditions, fine roots may begin breaking down within a few weeks; cool weather takes longer.
Before reusing the mix, check that it:
- Smells earthy rather than sour or rotten
- Crumbles instead of forming sticky clods
- Drains when watered
- Contains no large masses of decaying plant material
- Has no obvious pest infestation
The mix may now be cleaner and easier to work with, but it still needs nutrient and texture improvements before planting.
Do not seal wet soil in an airless container
Avoid tightly sealing wet potting soil in a bucket, bag, or tote. Without airflow, it can become anaerobic and develop a sour, sulfur-like, or stagnant smell.
Use a ventilated container or leave the lid slightly ajar under cover. Stir periodically, and spread the mix out temporarily if it becomes too wet.
Don’t Bury Kitchen Scraps Directly in Potting Soil
Burying vegetable peels, coffee grounds, or eggshells in old potting soil usually creates more problems than benefits.
Kitchen scraps need time to decompose before their nutrients become available. In a container, they can attract fungus gnats, fruit flies, rodents, and other pests. Wet scraps may smell, grow mold, or create oxygen-poor pockets around plant roots.
Eggshells are especially slow to break down. Crushing them helps them mix into compost, but they are not a quick fertilizer for potted plants.
A flowerpot is too small and too close to plant roots to function well as a compost bin.
Better options: compost pile, worm bin, or finished compost
Use kitchen scraps where they can decompose properly:
- Compost pile or tumbler: Suitable for mixed garden debris and household plant scraps.
- Worm bin: Useful for small amounts of fruit and vegetable scraps. Use the resulting castings as part of a soil blend.
- Municipal green-waste collection: A practical alternative when home composting is not possible.
Finished compost should be dark, crumbly, and earthy smelling, without recognizable food scraps.
How to add compost back into depleted potting soil
Blend finished compost evenly into old potting soil rather than layering it in the bottom of a pot or burying it in one spot.
Compost improves organic matter and contributes some nutrients, but too much can make container mixes dense and overly moisture-retentive. For vegetables and annual flowers, use compost alongside fresh potting mix and suitable fertilizer.
Use well-finished compost for seedlings, houseplants, and plants that dislike wet roots. Unfinished compost can continue decomposing and cause uneven moisture or nutrient availability.
How to Revitalize Old Potting Soil for Reuse
Treat old potting soil as one ingredient in a new mix, not as a ready-to-use product.
The best blend depends on the plant. A large outdoor tomato container can tolerate more reused material than a seedling tray or a small pot for a moisture-sensitive houseplant.
Blend in fresh potting mix or finished compost
For most containers, combine old mix with fresh potting mix and a smaller amount of finished compost. Fresh mix restores porosity and water management, while compost adds organic matter.
Use at least some new potting mix rather than reusing 100 percent of the old material. Increase the fresh portion if the old mix is fine-textured, compacted, or difficult to rewet.
For seedlings and young transplants, rely more heavily on fresh, clean potting mix because their roots are less tolerant of dense media, uneven nutrients, and lingering pests.
Add a suitable slow-release fertilizer or worm castings
Old potting soil is often short on nutrients even when it still looks dark and rich. Compost activator does not fix this.
Add a slow-release fertilizer appropriate for the crop and follow the label. Fertilizers for vegetables, flowering plants, houseplants, and acid-loving plants may differ in nutrient balance.
Worm castings can be a gentle organic amendment, but they should supplement—not replace—an airy potting medium and a reliable fertility plan for hungry plants.
Restore drainage and avoid compacted, exhausted mix
A good container mix holds moisture while allowing excess water to drain. If old soil feels heavy, muddy, or compressed after watering, it needs more than fertilizer.
Improve structure with fresh potting mix containing coarse materials such as perlite, pumice, rice hulls, or bark, depending on the plant and mix. Do not put rocks in the bottom of the pot to improve drainage. They reduce root space and do not improve the growing medium itself.
Use containers with drainage holes, and firm soil gently around roots rather than packing it down.
When Old Potting Soil Should Not Be Reused
Reusing potting soil can save money and reduce waste, but some mix is not worth the risk. Reserve questionable soil for composting when appropriate, or discard it according to local rules.
Soil from plants with disease or persistent pest problems
Do not reuse potting soil from plants with suspected root rot, wilt diseases, stem cankers, or other persistent disease symptoms. Also avoid or be very cautious with soil that had recurring fungus gnats, root mealybugs, scale, aphids, grubs, or other difficult pests.
Removing the plant does not guarantee that the problem is gone. Compost activator is not a disinfectant, and a few weeks of resting does not reliably eliminate pathogens or pests.
If you are uncertain, avoid using the mix for prized plants, seedlings, or edible crops.
Mix that smells sour, stays waterlogged, or has lost its structure
Discard or compost old mix if it has these warning signs:
| Warning sign | What it suggests | Best response |
|---|---|---|
| Sour, swampy, or rotten odor | Poor oxygen levels and anaerobic breakdown | Do not plant in it; compost or discard |
| Mix stays wet for many days | Compaction or degraded structure | Refresh heavily or replace |
| Fine, dusty material with few air spaces | Broken-down potting media | Use only in small amounts in compost, if appropriate |
| White crust on the surface or pot rim | Fertilizer or mineral salt buildup | Avoid for sensitive plants; replace or use cautiously after flushing |
| Repeated pest or disease history | Possible carryover problem | Do not reuse in containers |
A white crust does not always make soil unusable, but it indicates accumulated salts. Flushing may reduce soluble salts, yet heavily crusted or compacted mix is often more trouble than it is worth.
When to add old potting soil to a compost system instead
Old potting soil can be added to a compost pile in modest amounts. It helps absorb moisture from wet scraps and adds microorganisms. Mix it through the pile rather than adding thick, compacted layers.
The roots and organic matter in the mix are what decompose; much of the potting material itself remains as part of the finished compost. This is a good option for worn-out, root-filled mix that does not contain known disease or persistent pests.
Conclusion
Compost activator can help fine roots and small organic remnants break down in old potting soil, especially when the mix is warm, lightly moist, and aerated.
Do not expect it to restore tired container soil by itself. Remove large roots and debris, avoid sealing wet soil without airflow, and keep kitchen scraps in a proper composting system. Before planting, refresh the old mix with new potting material or finished compost, restore drainage, and add appropriate fertilizer.
If the original plant had disease, persistent pests, poor drainage, or severe salt buildup, composting or replacing the mix is usually safer.
FAQ
Can I plant immediately after adding compost activator to old potting soil?
You can plant immediately only if the old mix is already clean, well structured, and amended with fresh potting mix and fertilizer. Activator alone does not prepare depleted soil for a new plant.
If you added it to break down roots or debris, allow time for decomposition before planting.
How long do old roots and vegetable scraps take to decompose?
Fine roots may begin breaking down within weeks in warm, moist, aerated conditions. Thick roots and woody stems can take months.
Vegetable scraps can also take months in a small container. Chopped material in an active compost pile breaks down much faster than whole scraps buried in a flowerpot.
Can old potting soil go into a compost bin?
Yes. Add old potting soil to a compost bin in moderate amounts and mix it with other ingredients rather than forming a thick compacted layer. It can absorb excess moisture while leftover roots and organic particles decompose.
Avoid adding soil from plants with suspected diseases or persistent pests unless your composting method can reliably handle those risks.
Is it safe to reuse potting soil from last year’s containers?
It can be safe if the previous plants were healthy, the mix drains well, and there is no major salt buildup or pest issue. Remove large roots, refresh the mix with new potting soil or finished compost, and replenish nutrients with appropriate fertilizer.
For seedlings, sensitive houseplants, or plants that had problems the previous season, use fresh potting mix instead.
You Might Also Like