Can You Grow Orchids From Seed at Home?
The Short Answer: Yes, But Not Like Ordinary Seeds
Yes, you can grow orchids from seed at home, but it is very different from sowing tomatoes, basil, zinnias, or other familiar garden seeds. Orchid seeds are almost microscopic and do not contain the stored food most seeds use to sprout.
In nature, orchid seeds usually rely on specific fungi for nutrients until the young seedling can support itself. At home, growers usually replace that fungal partnership with a sterile nutrient gel inside a sealed jar or flask. This method is known as flasking.
So the honest answer is: growing orchids from seed is possible at home, but not reliably in ordinary potting mix and not usually without sterile technique or a prepared kit. If you see advice saying orchid seed can simply be sprinkled into a pot and grown like wildflowers, be skeptical. It can happen occasionally, but it is not dependable.
Why orchid seeds are different from vegetable or flower seeds
Most garden seeds contain a young plant and stored food. That food lets the seedling push out roots and shoots until it can photosynthesize.
Orchid seeds are dust-like, extremely light, and produced in huge numbers. A single pod can contain thousands or even millions of seeds, but each seed has very little reserve food.
Because of that, an orchid seed needs an outside food source. In the wild, that source is usually a compatible mycorrhizal fungus. In home propagation, it is usually a sterile medium containing water, sugar, minerals, and a gelling agent.
That is why ordinary seed-starting advice—fine compost, trays, warmth, and careful watering—does not translate well to orchids.
Flasking vs. natural germination
There are two main ways orchid seeds germinate:
| Method | How it works | Home success level |
|---|---|---|
| Flasking | Seeds are sown onto sterile nutrient gel in a sealed container | Most realistic method for home growers |
| Natural or symbiotic germination | Seeds germinate with help from compatible fungi in bark, moss, soil, or around parent plants | Possible, but unpredictable |
Flasking is sometimes called laboratory propagation, but it does not always require a professional lab. Many hobby growers use jars, a pressure cooker or sterilizing method, disinfectant, gloves, labels, and a very clean workspace. Others start with an orchid seed sowing kit or buy prepared flasks.
Natural germination is much less controlled. You might sow seed around an established orchid or in a suitable outdoor habitat and hope the right fungus is present. This may work for some hardy terrestrial orchids in appropriate conditions, but it is not reliable for most common houseplant orchids.
What beginners should realistically expect
If you are new to orchid seed propagation, expect a learning curve. Your first attempt may fail from contamination, old seed, poor sterilization, or weak seedlings after deflasking. That is normal.
Realistic expectations include:
- Germination may take weeks to months.
- Seedlings may stay in flasks for many months.
- Flowering can take several years.
- Seed-grown orchids may not match the parent plant exactly.
- Contamination is common, especially at first.
If your goal is simply to get more orchids, seed is not the easiest route. If you want to experience orchid reproduction or create new hybrids, flasking can be very rewarding.
What You Need Before Starting Orchid Seeds
Before sowing, decide how involved you want to be. You can build a basic home flasking setup, but many beginners do better with a prepared orchid flasking kit, pre-poured sterile flasks, or already-flasked seedlings.
At minimum, you need viable seed, a clean work area, sterile containers, suitable medium, labels, and patience.
Getting or collecting orchid seed pods
You can collect seed from your own orchid or buy it from a reputable source.
To collect your own seed, the plant must be pollinated first. Many orchids do not self-pollinate indoors, so you may need to move pollen by hand. If pollination succeeds, the flower fades and a seed pod swells. Depending on the orchid, the pod may take months to mature.
There are two common collection stages:
- Green pod sowing: The pod is harvested before it splits. The outside is sterilized, then opened under clean conditions. This often reduces contamination because the seed has not been exposed to air.
- Dry seed sowing: The pod ripens and splits, and dry seed is collected. This is convenient, but the seed may carry more contaminants.
Buying orchid seed can be risky because it is easy to mislabel and difficult to judge by sight. Viability also declines with age and poor storage. Use specialist orchid sources when possible, and be cautious of vague listings promising rare blue, black, or rainbow orchids.
Choosing a seed-growing medium
Orchid seed medium is not soil. It is usually a gel containing water, sugar, minerals, and a gelling ingredient such as agar. Some media are general-purpose; others are formulated for particular orchid groups or growth stages.
Beginner-friendly options include:
- Prepared orchid seed sowing medium
- A flasking kit with pre-measured ingredients
- Pre-poured sterile flasks from a specialist supplier
Making your own medium is possible, but it adds variables. You must measure accurately, achieve the right texture, sterilize properly, and keep everything clean. If the medium is contaminated or unsuitable, results suffer.
Do not use regular potting soil, seed-starting compost, garden soil, or orchid bark for germination. Those materials may be useful later, after seedlings have leaves and roots.
Simple home setup vs. lab-style setup
A home setup does not need to be expensive, but it must be clean and organized.
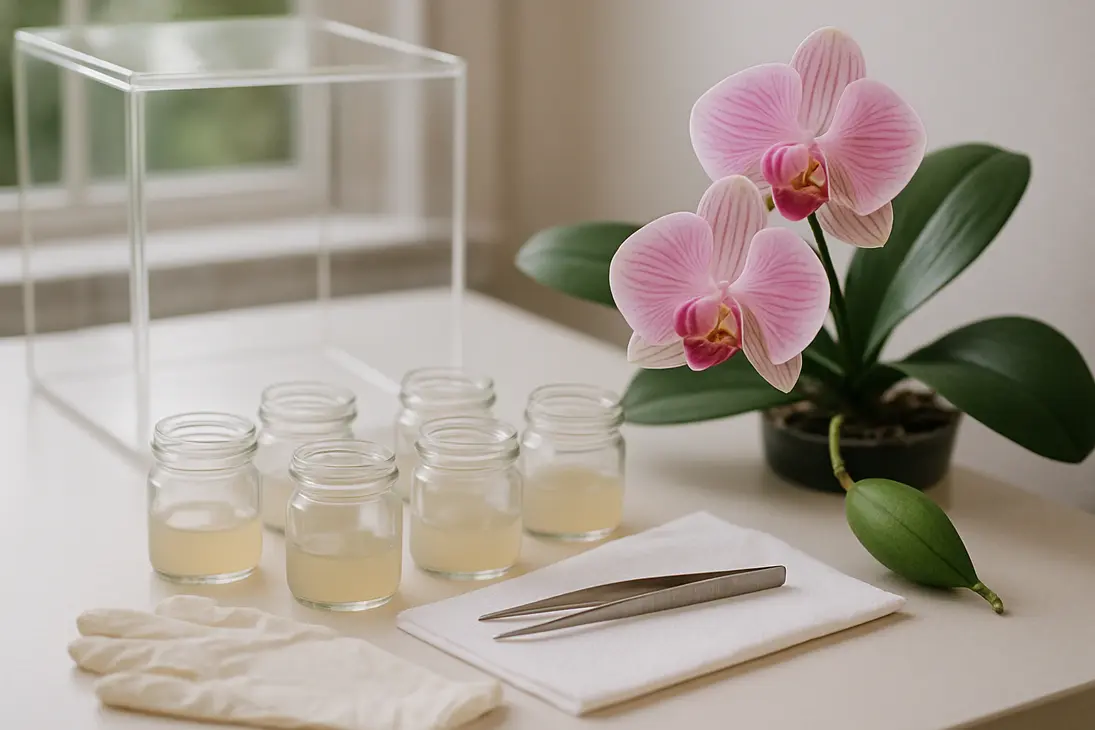
A simple flasking setup may include:
- Small glass jars or culture vessels with lids
- Orchid seed sowing medium
- A pressure cooker or other reliable sterilizing method
- Bleach or another disinfectant
- Sterile water
- Tweezers, scalpel, or sharp blade
- Gloves and paper towels
- A clear storage box or still-air box
- Labels and waterproof marker
A lab-style setup might add a laminar flow hood, laboratory media, sterile instruments, and controlled growing shelves. These improve consistency, but they are not essential for every hobbyist.
The trade-off is simple: the more controlled the setup, the better your odds. The more improvised the setup, the more losses you should expect.
Safety and cleanliness basics
Sterility is the heart of orchid seed sowing. The nutrient medium that feeds orchid seedlings also feeds mold and bacteria. A tiny contamination event can quickly ruin a flask.
Basic precautions include:
- Clean the work surface before starting.
- Wash hands and wear clean gloves.
- Avoid drafts from fans, windows, and vents.
- Sterilize jars, medium, and tools.
- Work slowly and keep containers open as briefly as possible.
- Avoid talking, coughing, or breathing over open flasks.
- Label everything immediately.
If you use bleach, alcohol, heat, or pressure sterilization, follow product and equipment instructions carefully. Let hot jars cool before handling, and do not create sealed pressure hazards.
How to Grow Orchid Seeds at Home Step by Step
The most realistic home method is sterile flasking. Details vary by orchid, medium, and equipment, but the basic process is consistent.
1. Prepare the workspace and containers
Choose a calm time when you will not be interrupted. Clean the area thoroughly and reduce air movement. Many hobbyists use a still-air box made from a clear plastic storage bin to reduce dust and drafts.
Prepare jars or flasks with sterilized, cooled nutrient medium before sowing. If using a kit, follow its instructions closely.
Lay out everything in order:
- Flasks
- Sterilized tools
- Seed pod or seed packet
- Disinfectant
- Sterile water, if needed
- Gloves
- Waste container
- Marker
Good organization reduces mistakes and keeps flasks open for less time.
2. Sterilize tools, jars, and seed pods
If using a green seed pod, disinfect the outside before opening it. The goal is to kill microbes on the pod surface without damaging the seed inside. Many growers use diluted household bleach followed by sterile rinses, but timing and dilution vary, so follow your kit or chosen method.
Dry seed is more difficult because each dust-like seed has already been exposed to air. Some growers suspend the seed in sterilizing solution, then rinse or sow carefully.
Tools such as blades and tweezers should be sterilized before use. Jars and medium should already be sterilized. A washed jar is not clean enough for orchid seed work; “clean” and “sterile” are not the same thing.
3. Sow the orchid seeds onto the medium
Open each flask only as long as necessary.
For a green pod, open it with a sterile blade and transfer seed onto the surface of the medium. Orchid seed is not planted in holes or covered. It is usually sprinkled or lightly spread over the gel.
For dry seed, use very little. Beginners often oversow, creating crowded flasks that are difficult to manage later. Aim for a light dusting.
After sowing, close the flask promptly. Do not touch the inside of the lid, jar rim, or medium with anything non-sterile.
4. Seal, label, and place the flasks
Seal the containers according to your method. They must stay closed enough to prevent contamination while keeping seedlings in a stable, humid environment.
Label each flask with:
- Orchid parentage or seed source
- Date sown
- Medium used, if relevant
- Green pod or dry seed
- Any important notes
Place flasks in bright, indirect light. Avoid direct sun, which can overheat them. Gentle grow lights can work well. Temperature should match the orchid type; warm-growing and cool-growing orchids should not be treated the same.
5. Watch for germination and contamination
At first, nothing may seem to happen. Orchid germination is slow and subtle. Seeds may swell into tiny bead-like structures called protocorms. Later, small leaves and roots appear.
Check flasks regularly, but do not open healthy flasks just to look.
Signs of contamination include:
- Fuzzy mold
- Cloudy slime
- Colored patches spreading through the medium
- Bad odor if opened
- Seedlings collapsing in discolored areas
If one flask contaminates, move it away from healthy ones. Do not open moldy flasks near clean flasks. Beginners are usually better off discarding badly contaminated flasks safely and improving the process next time.
6. Move seedlings on when they are large enough
Seedlings are not ready to leave the flask as soon as they turn green. They need enough leaves and roots to survive outside. Crowded seedlings may first be moved to fresh medium in new flasks, a process called replating.
Deflasking—the move from sterile flask to regular growing conditions—is risky. Inside the flask, seedlings live in high humidity with little airflow and little exposure to microbes. Outside, they can dry out or rot quickly.
When seedlings have several leaves and visible roots, they can usually be removed, rinsed gently to remove gel, and planted into a fine, airy orchid seedling mix. This may include fine bark, sphagnum moss, perlite, or other small-grade orchid materials, depending on the orchid.
After deflasking:
- Keep humidity high at first.
- Provide gentle airflow.
- Use small pots or community trays.
- Keep the mix moist but not waterlogged.
- Avoid strong fertilizer early on.
- Acclimate seedlings gradually.
Many losses happen because seedlings are kept too wet, too dry, too dark, or too exposed too soon.
Common Problems When Starting Orchid Seeds
Orchid seed growing has problems that ordinary seed-starting does not. Some are preventable; others are part of the process. Even experienced growers lose flasks.
Mold or bacteria in the flask
Contamination is the most common frustration. The same nutrient medium that feeds orchid seedlings also feeds fungi and bacteria.
Common causes include:
- Jars or medium not fully sterilized
- Seed pod not disinfected well enough
- Dry seed carrying contaminants
- Tools touching non-sterile surfaces
- Drafts blowing dust into open flasks
- Flasks left open too long
If one flask contaminates, isolate it. Do not open it near clean flasks. For the next attempt, simplify the process and look for weak points. Often, contamination comes from several small lapses rather than one obvious mistake.
Seeds that never germinate
Seeds may fail because they are old, immature, poorly stored, damaged during sterilization, or not actually orchid seed. The medium may be unsuitable, the temperature wrong, or the pod harvested at the wrong stage.
Green pods harvested too early may contain undeveloped embryos. Pods harvested too late may split and become contaminated. Timing varies by orchid type, so research the genus or hybrid you are working with.
Also be patient. Some viable orchid seed is slow. Do not discard a clean flask too quickly unless you know the expected timeline.
Seedlings dying after removal from the flask
Deflasking losses are common. Seedlings raised in sealed, humid conditions have tender leaves and roots. Once exposed to normal air, they may dry out or rot.
The most common mistake is overwatering. A constantly soggy mix can suffocate roots and encourage rot. But moving seedlings straight into dry household air can also kill them.
Use a balanced transition: high humidity, gentle airflow, fine airy media, and gradual adjustment.
Starting with non-viable or mislabeled seeds
Seed quality matters. Orchid seed is easy to misrepresent because most buyers cannot identify it by sight. Dust in a packet may not be viable seed, and real seed may still be old or mislabeled.
Be especially cautious with rare-color claims online. Also remember that seed-grown orchids are genetically variable. A seedling from a famous hybrid is not a clone unless it was produced through tissue culture.
For a first attempt, use seed from a reliable orchid grower or a beginner-friendly kit with known seed.
Expecting flowers too soon
Growing orchids from seed is slow. Some orchids may bloom in a few years under good conditions, while others take five years or more. Large-growing and slower types often take longer.
The timeline depends on the orchid, temperature, light, seedling vigor, potting, feeding, and setbacks. If you want flowers quickly, buy a young plant near blooming size.
Easier Ways to Propagate Orchids If Seed Growing Is Too Difficult
Growing orchids from seed is fascinating, but it is not the easiest way to make more plants. Many home growers are happier with division, keikis, flasked seedlings, or young plants.
Dividing mature orchids
Many sympodial orchids, including Cattleya, Oncidium, Cymbidium, and some Dendrobium types, can be divided when mature and well established.
Division produces plants that are genetically identical to the original. It is faster and more predictable than seed. The trade-off is that you need a large, healthy plant. Dividing a weak orchid can set it back badly.
A good division usually has several healthy growths and roots. Tiny divisions may survive, but they often take years to regain strength.
Growing keikis
Some orchids produce small plantlets called keikis, especially certain Phalaenopsis and Dendrobium types. A keiki is a clone of the parent plant. It may form on a flower spike or cane and eventually grow its own roots.
Once the keiki has enough roots to support itself, it can be removed and potted separately. This is much easier than seed sowing because the plantlet already has leaves and roots.
Do not remove keikis too early. A tiny keiki with short or no roots still depends on the parent plant.
Buying flasked seedlings or young plants
If you want to raise orchids without doing sterile seed sowing yourself, buying flasked seedlings is a good middle ground. Germination has already been done, but you still get to deflask, pot, and grow the seedlings on.
Buying young plants is easier still. They cost more than seed, but they save time and reduce uncertainty.
| Method | Difficulty | Time to flowers | Predictability |
|---|---|---|---|
| Seed flasking at home | High | Long | Variable |
| Buying flasked seedlings | Medium | Medium to long | Moderate |
| Buying young plants | Low to medium | Shorter | Better |
| Division | Low to medium | Often shortest | High |
| Keikis | Low | Medium | High |
When seed growing is still worth trying
Seed growing is worth trying if you enjoy experimentation, want to make your own crosses, or are interested in orchid biology. It can also interest conservation-minded growers working with appropriate, legally obtained seed and proper methods.
It is less worthwhile if your only goal is to cheaply fill a windowsill with blooming orchids. Once you account for materials, failed flasks, time, and years of growing, seed is rarely the cheapest path to flowers.
Conclusion
Growing orchids from seed at home is possible, but it is not like planting ordinary seeds in compost. Orchid seeds are tiny, lack stored food, and usually need either a sterile nutrient medium or the right fungal partner to germinate.
For most home growers, sterile flasking offers the best chance of success. It requires viable seed, suitable medium, careful sterilization, clean handling, and patience. Even then, contamination and losses are normal.
If you are curious and patient, start with a flasking kit or a simple, well-organized sterile setup. If you mainly want more orchids with better odds, try division, keikis, flasked seedlings, or young plants first.
FAQ
Can orchids be grown from seed without a lab?
Yes. Orchids can be grown from seed without a professional lab, but they usually still need sterile technique. A careful home setup with sterilized jars, nutrient medium, disinfected tools, and a clean workspace can work.
Growing orchid seed with no special equipment is possible only in a low-success way, such as sowing seed around parent plants and hoping the right fungi are present.
How long does it take to grow an orchid from seed to flower?
It usually takes several years. Some orchids may flower in about three years under good conditions, while others may take five years or longer.
The seedling must germinate, grow in flask, survive deflasking, mature in pots, and reach blooming size. Setbacks can add months or years.
Can I plant orchid seeds in regular potting soil?
No, not reliably. Regular potting soil does not provide what orchid seeds need to germinate. Orchid seeds lack stored food and usually require either a compatible fungus or a sterile nutrient medium.
Potting mixes, bark, moss, and other orchid media are useful later, after seedlings have leaves and roots.
Is it better to grow orchids from seed or from cuttings/division?
For most home growers, division, keikis, or buying young plants is better. These methods are faster, easier, and more predictable.
Seed growing is better if you want to make hybrids, learn the propagation process, or enjoy long-term experimentation. It is rewarding, but it requires more patience and accepts more failure.
You Might Also Like