How Pot Design Prevents Root Rot During Watering
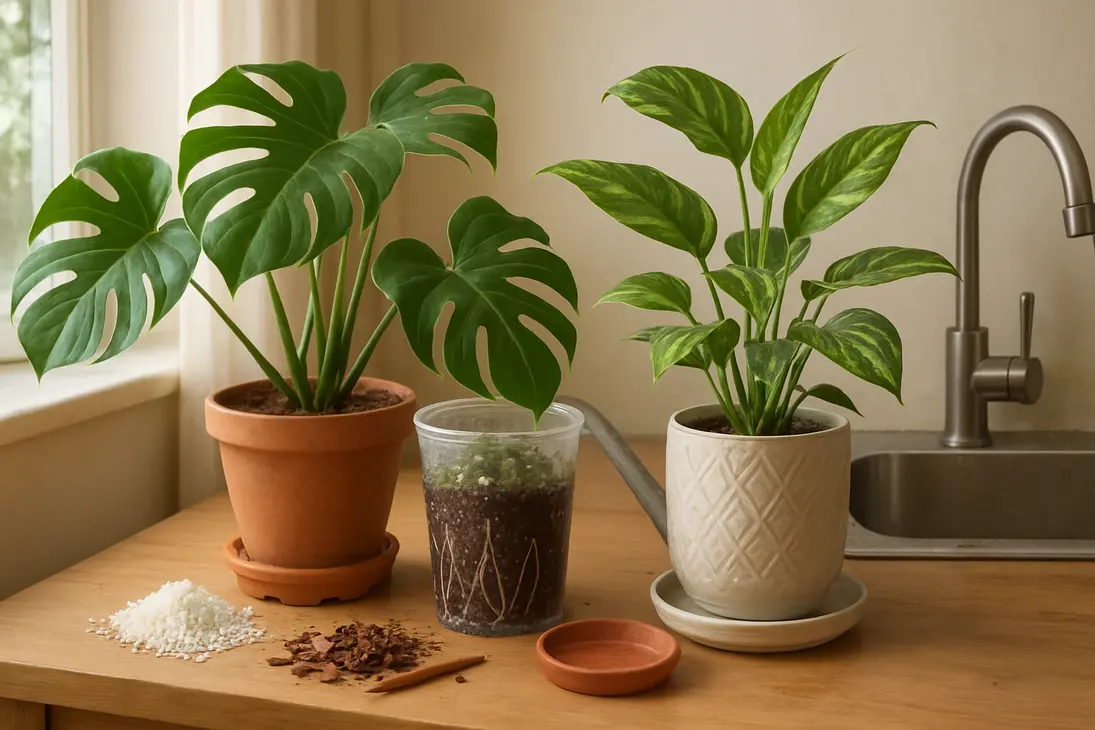
Pot design root rot prevention has one goal: keep roots moist, but not trapped in stale, airless conditions. Root rot often begins when the root zone stays wet too long, oxygen drops, roots weaken, and rot-causing organisms spread.
A pot is not just decoration. It controls how quickly water leaves, how much air reaches lower roots, how long the mix stays wet, and how easy it is to inspect root health. A good pot gives you more margin for error; a poor one can make careful watering risky.
Why pot design matters for root rot prevention
Roots need both water and oxygen. After watering, potting mix should hold useful moisture while allowing excess water to drain and air to return to the spaces between particles. If those spaces stay filled with water, roots cannot respire normally.
Containers make this harder than garden soil. In the ground, water can move through a large soil profile. In a pot, water movement is limited by the walls, drainage holes, potting mix, and container shape. Too few holes, an oversized pot, a tight cachepot, or a waterlogged lower layer can keep roots wet long after the surface looks dry.
Good pot design lets runoff escape, keeps the base out of standing water, improves airflow, matches pot volume to root volume, and makes moisture easier to monitor. It does not replace good watering habits, but it makes them easier to follow.
Pot design and watering factors that prevent root rot
Drainage features that keep roots from sitting in water
The key question is not only “Does this pot have a hole?” It is “Can water leave the root zone and move away from the pot?” A container can technically drain but still keep roots wet if holes are blocked, the pot sits flat in a saucer, or an outer pot traps runoff.
Drainage holes are necessary, but not enough
Drainage holes are the baseline for most potted plants. Without them, water leaves only by evaporation or plant uptake, which is slow and unpredictable indoors or in cool weather.
For root rot prevention, choose pots with:
- At least one open drainage hole for small pots
- Several holes or a broad drainage area for larger pots
- Holes free of labels, plugs, compacted mix, and roots
- A base that lets water reach the holes instead of pooling
A single tiny hole in a large pot may drain too slowly. If water takes a long time to escape, or the pot stays heavy for many days, the drainage design may be inadequate.
Raised feet, mesh bottoms, and elevated inner pots
A pot sitting directly on a flat saucer, patio, or countertop can seal its drainage hole. Raised feet create space for water to escape and air to reach the base.
Useful options include built-in pot feet, risers, pot toes, mesh-bottom orchid pots, net pots, and nursery pots lifted inside decorative containers. For houseplants, an inner nursery pot should sit above collected water on a stable platform such as a riser, inverted saucer, or pebbled tray.
Saucers and cachepots: useful, but only if emptied
Saucers protect surfaces, and cachepots improve appearance. The problem starts when runoff remains in them. If the pot sits in that water, the mix can wick moisture back up and keep the lower root zone saturated.
Water thoroughly, let the pot drain, empty the saucer or cachepot, and check again later if more water collects. For large indoor plants, remove trapped runoff with a sponge, towel, turkey baster, or wet/dry vacuum.
Why “rocks at the bottom” are not a real drainage solution
Gravel, stones, broken pottery, or lava rock at the bottom of a pot do not fix poor drainage. They often make the usable root zone shallower, and water can perch in the fine potting mix above the coarse layer instead of moving freely into it.
A better approach is drainage throughout the whole container: real drainage holes, an airy mix, and an elevated base. Rocks can help lift an inner pot inside a cachepot, but they should not replace drainage in a no-hole planter.
Pot size and shape: matching the container to the root system
A pot holds roots and potting mix. If it contains far more mix than the roots can use, that extra mix stays wet longer. This is a common cause of root rot after repotting.
Why pots that are too large stay wet too long
When a small root ball is placed in a large pot, the plant cannot pull water evenly from all the surrounding mix. Outer and lower areas may remain damp for days or weeks, especially in plastic pots, cool rooms, low light, or heavy mixes.
The surface may feel dry while the bottom is still wet. If you water based only on the top inch, the plant can be repeatedly saturated even though it appears to need water.
Choosing pot size based on the root ball
For most houseplants, size up gradually. A practical step is a pot about 1–2 inches wider than the current root ball for small to medium plants, and only a modest increase for larger plants.
Choose based on roots, not foliage. If roots fill the current pot, size up one step. If roots were trimmed because of rot, downsize to match the remaining root ball. If a plant is top-heavy but not root-bound, use a heavier pot rather than a much larger one.
Shallow vs. deep pots and moisture distribution
Pot shape affects how water settles. Tall, narrow pots can hold a damp lower zone, especially when roots are concentrated near the top. Wide, shallow pots dry more evenly for shallow-rooted plants but may dry too quickly for thirsty plants in warm conditions.
Succulents, cacti, many herbs, and shallow-rooted plants often suit shallower containers with fast-draining mix. Orchids and epiphytes may benefit from side ventilation or mesh pots. Large shrubs and trees need stability and depth, but their mix must stay open and free-draining.
When to size up, downsize, or repot
Size up when roots circle, fill the pot, dry out unusually fast, or push the plant upward. Repot during active growth when possible.
Downsize after root loss from rot. Returning a reduced root system to a large wet container often repeats the problem. Also repot if the mix smells sour, stays wet much longer than before, collapses, or becomes compacted.
Pot materials and visibility: how containers affect drying and monitoring
Pot material affects drying speed and inspection. Some containers help moisture leave faster; others retain it. The right choice depends on the plant, mix, room conditions, and your watering habits.
Terracotta and breathable clay pots
Unglazed terracotta and breathable clay allow some moisture to evaporate through the walls. This helps the mix dry faster and improves air exchange around the root zone.
They are useful for plants prone to rot, including many succulents, cacti, Mediterranean herbs, and plants owned by generous waterers. The trade-off is faster drying, possible mineral buildup, and more frequent watering in warm or windy conditions. Terracotta is not a cure for overwatering, but it provides a helpful buffer.
Plastic nursery pots and moisture retention
Plastic pots hold moisture longer because water does not evaporate through the sides. This can help moisture-loving plants, seedlings, and homes with dry air, but it can increase risk for plants that need to dry down.
Plastic nursery pots are still excellent when used properly. They are lightweight, inexpensive, easy to lift, and often have good drainage. Pair them with a well-aerated mix, and check the lower root zone before watering.
Clear pots for checking roots and moisture
Clear pots are useful for orchids, cuttings, seedlings, and anyone learning a plant’s watering rhythm. They let you see condensation, root growth, algae, and wet areas that would otherwise be hidden.
If clear nursery pots sit inside decorative pots, lift them out regularly. Healthy roots vary by plant but are generally firm. Rotten roots are often brown or black, mushy, hollow, and may smell unpleasant.
Decorative outer pots: style without sacrificing drainage
Decorative pots are safest as cover pots, not primary growing containers. Keep the plant in a nursery pot with drainage, then place that inside the decorative pot.
Make sure the inner pot can be removed easily, leave some airflow space, lift it above collected water, and empty the outer pot after watering. If a decorative container has no drainage hole, use it as an outer sleeve.
Self-watering pots, wick systems, and no-drainage planters
Self-watering designs can work, but they need the right plant, mix, and reservoir setup. The danger is not the reservoir itself; it is constant saturation in a mix with too little air.
Do self-watering pots cause root rot?
Self-watering pots do not automatically cause root rot. Many consistent-moisture plants, such as African violets, some ferns, peace lilies, and tropical foliage plants, can grow well in them.
They become risky when the plant prefers dry-down, the mix is dense, the reservoir keeps the lower layer saturated, there is no overflow hole, the root system is small or damaged, or the plant sits in low light or cool temperatures. Succulents, cacti, snake plants, and many drought-tolerant herbs are usually poor candidates.
How wick systems can work safely
A wick system pulls water from a reservoir into the mix by capillary action. It works best when the wick supplies moisture slowly and the mix still holds plenty of air.
Use wick systems with plants that like steady moisture, a chunky mix, and a modest wick. Let the reservoir empty before refilling if the plant needs some dry-down. If leaves yellow, the pot stays heavy, or bottom roots turn dark and soft, the system may be keeping roots too wet.
Reservoir depth, air gaps, and overflow protection
A good self-watering pot separates the root zone from standing water. There should be an air gap, platform, or design that prevents the whole potting column from sitting directly in the reservoir.
Look for an overflow hole, a water-level indicator or easy checking method, access for cleaning, air space between water and roots, and a reservoir sized to the plant. Avoid topping off the reservoir by habit. Refill based on plant use, light, season, and lower-mix moisture.
Why no-drainage pots are high-risk for most plants
No-drainage planters leave little room for error. You must add only the water the plant can use before oxygen runs low, but plant water use changes with light, temperature, season, growth rate, and root health.
For most plants, no-drainage pots are best used as cachepots. If you must plant directly into one, use a small plant, very airy mix, measured watering, and a probe or skewer to check the lower layer. Even then, the risk is higher than with a draining pot.
Watering habits that work with good pot design
Good design lowers root rot risk, but it cannot fix constant overwatering. The goal is to water thoroughly when needed, then let the pot dry to the level the species prefers.
Check moisture near the bottom before watering
The top dries first; the bottom dries last. Root rot usually develops where water lingers, so checking only the surface is unreliable.
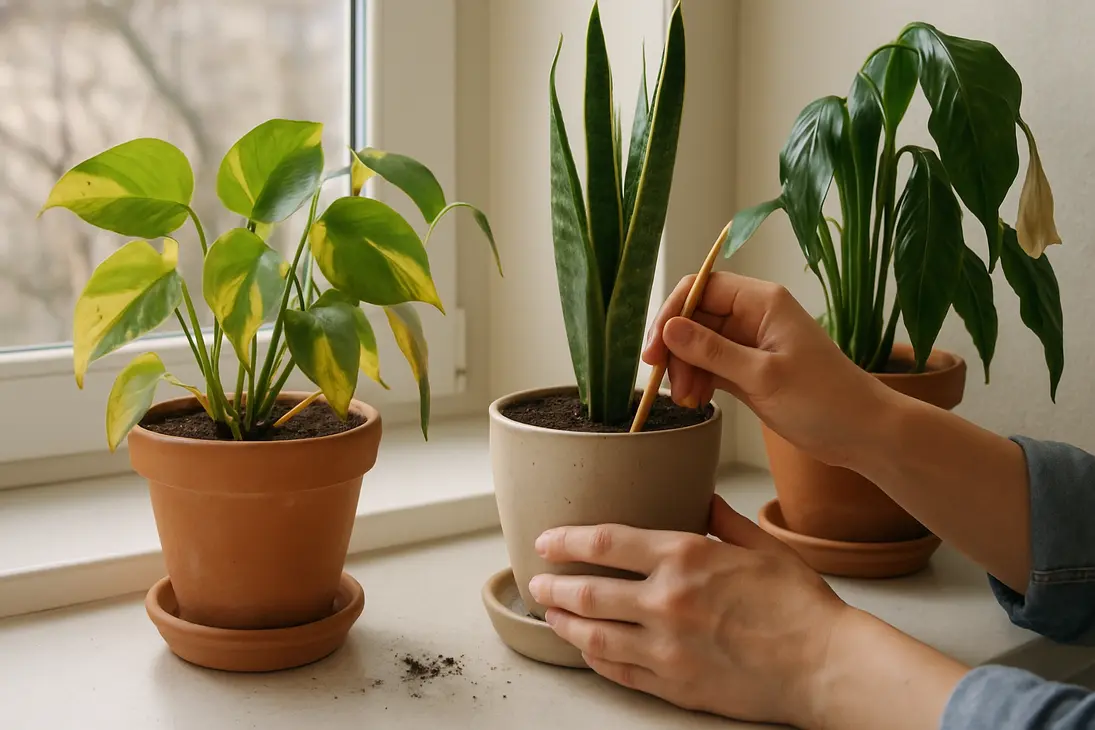
Use pot weight, a wooden skewer, a moisture meter, clear pot walls, or access through drainage holes to judge lower moisture. Water when the lower root zone has reached the plant’s preferred dryness, not simply because a set number of days has passed.
Water thoroughly, then let excess drain
For pots with drainage, thorough watering is usually better than frequent small sips. Water until the root ball is evenly moistened and some excess drains out. Then stop, let the pot drain fully, and allow air to return to the mix.
Avoid letting pots stand in runoff
Standing runoff defeats drainage. It can keep excess moisture, salts, and old fertilizer around the roots. Empty saucers and cachepots after watering, especially for rot-prone plants.
Outdoor containers need the same attention after rain. Make sure they are not sitting in puddles, blocked trays, or decorative bowls.
Pair the pot with a well-aerated potting mix
Pot design and potting mix work together. A pot with excellent holes can still stay wet too long if the mix is dense, compacted, or broken down.
A well-aerated mix contains ingredients that maintain air spaces, such as bark, perlite, pumice, coarse sand, coconut chips, or other chunky amendments suited to the plant. Fine garden soil is usually poor in containers because it compacts and drains badly. If wet roots keep recurring, reassess pot size, drainage, material, and mix together.
Conclusion
The best root-rot-preventing pot combines open drainage holes, airflow under and around the container, size matched to the root ball, a safe path for runoff, and potting mix that holds both moisture and oxygen.
Drainage holes are only the start. Raised feet, emptied saucers, breathable materials, clear inspection pots, well-designed self-watering reservoirs, and gradual pot sizing all help roots breathe after watering.
FAQ
Can a plant still get root rot in a pot with drainage holes?
Yes. Drainage holes reduce risk, but a plant can still rot if the pot is too large, the mix is dense, the saucer stays full, the hole is blocked, or the plant is watered again before the lower root zone dries enough.
What pot is best for preventing root rot?
For most plants, choose a pot with open drainage holes, a slightly elevated base, and a size close to the root ball. Terracotta helps plants that like to dry quickly. Plastic nursery pots work well with airy mix and emptied runoff. Clear pots help with monitoring.
Are self-watering pots safe for houseplants?
They can be safe for plants that prefer steady moisture if the pot has an air gap, overflow protection, and airy mix. They are riskier for drought-tolerant plants and plants in low light or cool rooms. Do not keep the reservoir full by habit.
Should I reuse a pot or soil after root rot?
You can usually reuse the pot after removing debris, washing it, and disinfecting it. Reusing the same potting soil is riskier because it may be compacted, contaminated with decaying roots, and poor in structure. Fresh, well-aerated mix is safer for a recovering plant.
You Might Also Like