How Do You Repot Large Plants Without Making Them Unstable?
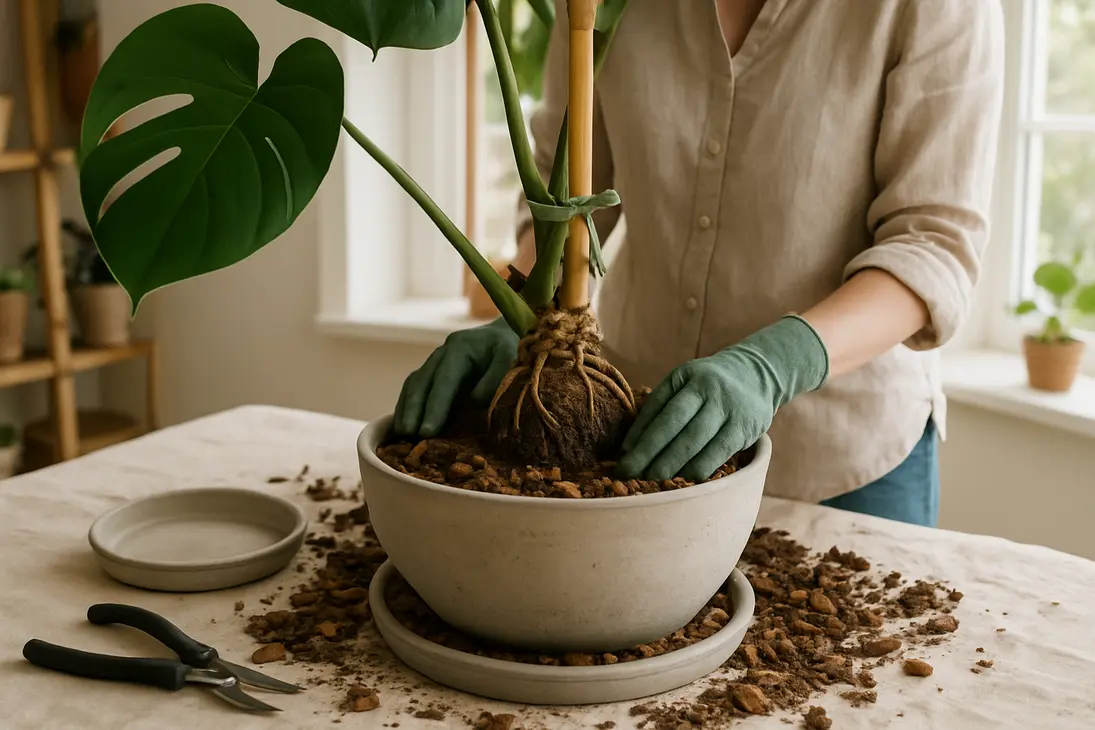
Repotting large plants is not just a bigger version of repotting small ones. Mature fiddle leaf figs, monsteras, rubber plants, palms, birds of paradise, dracaenas, and indoor trees have heavier canopies, larger root balls, and more leverage if they lean. The goal is to give roots more space while keeping the plant upright as it re-anchors.
Stability comes from five things working together: the right pot, an intact root ball where possible, careful centering, properly firmed soil, and gentle aftercare.
When a Large Plant Actually Needs Repotting
Do not repot a large plant just because it looks big above the soil. Unnecessary repotting can turn a stable plant into a wobbly one, especially if the root ball is disturbed or placed in an oversized pot.
Repot when there is a clear reason, such as:
- Roots circling tightly inside the pot
- Roots growing through drainage holes
- Water running straight through without soaking in
- Compacted, sour-smelling, or poorly aerated soil
- The plant drying out much faster than before
- Slowed growth during the normal growing season
- The plant becoming unstable in its current pot
- Salt buildup or potting mix that has broken down
For very large, established plants, top-dressing may be safer than full repotting. Scrape away the top inch or two of tired mix, avoiding major roots, and replace it with fresh mix. This works when the plant is stable, the pot is still large enough, and the roots are not badly congested.
Full repotting is better when the root ball is crowded, watering no longer works well, drainage has failed, or the plant is tipping because the container is too small, light, or narrow.
Choose a Pot That Keeps the Plant Stable
The pot is the foundation. For large plants, the best container is not always the biggest one. It is the one that gives the roots enough space while lowering the plant’s center of gravity.
A stable pot should have:
- Drainage holes
- Enough width to balance the canopy
- Enough weight to resist tipping
- A base that does not narrow sharply
- A size increase that matches the root ball, not just the plant’s height
Think of the plant, soil, and pot as one unit. If most of the weight is above the soil and little is in the base, the plant will lean or topple more easily.
Pot Size: Bigger Isn’t Always Better
Moving a large plant into a much bigger pot may seem stabilizing, but it often creates problems. Excess soil holds moisture the roots cannot use, especially indoors where light and airflow are limited. That can lead to root stress, rot, and a plant that sits loosely in a large volume of mix.
For most large houseplants, increase the pot by about 2 to 4 inches in diameter. A 10-inch pot usually moves to 12 inches; a 12-inch pot may move to 14 or 16 inches. Very large pots usually need only a modest increase unless the roots truly need more room.
Depth matters too. Do not bury the root ball deep in a tall pot. The top of the root ball should sit near the same height it did before, with enough space below the rim for watering.
Heavy, Wide-Based Pots for Top-Heavy Plants
Top-heavy plants need containers that resist leverage. A narrow, lightweight pot can make a repotted plant hazardous.
Good choices include terracotta, ceramic, concrete, fiberstone, or another weighty material. Look for a broad base, a lower wider shape, and enough mass to balance the canopy. If you prefer a lightweight decorative planter, use it as a cachepot with a sturdier inner pot.
You can add weight to the bottom of an outer container, but do not block drainage or leave standing water around the roots. Weight helps, but it is not a substitute for a properly sized, well-draining pot.
Drainage Without Sacrificing Stability
A stable plant still needs drainage. Avoid using a heavy decorative pot with no drainage hole as the only container. Water trapped at the bottom damages roots, and weak roots cannot anchor a large plant well.
Better options include:
- A heavy pot with drainage holes and a saucer
- A nursery pot set inside a heavy cachepot, with excess water removed after watering
- Pot feet or a stand that lets water escape
- A well-aerated potting mix suited to the plant
Do not rely on gravel at the bottom of a pot without drainage. It does not create true drainage and can leave water sitting below the root zone.
Prepare the Plant Before Moving It
Preparation prevents a heavy repot from becoming a struggle. Water the plant one to three days before repotting if the soil is very dry. Slightly moist soil holds together better than bone-dry soil, and hydrated roots are less brittle. Avoid working with waterlogged soil because it is heavier and more likely to collapse.
Before you start:
- Clear a wide work area.
- Lay down a tarp, sheet, cardboard, or mat.
- Prepare the new pot, fresh mix, pruners, gloves, stakes, and ties.
- Ask for help if the plant is too large to control safely.
- Tie long stems loosely with soft tape, cloth strips, or twine.
- Gather large leaves gently upward so they do not snap.
Do not lift a single-trunk plant by the trunk. Tip the pot, support the root ball, and ease the plant out. For plastic pots, squeeze the sides. For ceramic or terracotta, slide a long knife, plant label, or narrow trowel around the inside edge. If the plant is very tall, lay it partly on its side with towels or cardboard protecting the stems and leaves.
Repot the Plant Without Damaging the Roots
Once the plant is out, disturb the roots only as much as necessary. Large plants depend on their root ball for water uptake and anchoring. Aggressive root teasing can make the plant unstable and slow recovery.
Use this process:
- Prepare the new pot. Add enough fresh mix so the root ball will sit at the correct height.
- Remove the plant carefully. Tip, slide, and support the root ball instead of pulling the stems.
- Inspect the roots. Healthy roots are usually firm; rotten roots are often mushy, dark, and may smell bad.
- Loosen only what is needed. Gently tease the outer layer or make a few shallow vertical cuts if roots are circling densely.
- Trim damaged roots. Remove dead, mushy, or broken roots with clean pruners.
- Set the plant in the new pot. Keep it upright, centered, and at the same planting depth.
- Backfill in layers. Add mix around the sides and firm gently as you go.
- Check alignment. Step back and look from several angles before filling completely.
- Water thoroughly. Let the soil settle and add more mix if low spots appear.
Use a potting mix suited to the plant, not dense garden soil. Many large tropical houseplants prefer a chunky, breathable mix with ingredients such as potting soil, bark, perlite, pumice, or coco coir. The mix should hold the root ball firmly without becoming heavy and airless.
Support the Trunk or Main Stems While Repotting
When the root ball is loose, the canopy can pull sideways and tear fine roots. Support the trunk or main stems while another person handles the pot or backfills. If working alone, let the plant lean lightly against a padded wall, chair, or temporary support.
For multi-stem plants, gather stems loosely and support the clump near the base. For climbing plants such as mature monstera or philodendron, keep the moss pole, trellis, or support attached if possible. Removing it can destabilize the plant.
If the support needs replacing, position the new pole or stake before the pot is fully backfilled. Insert it near the root ball, avoiding thick roots where possible.
Keep the Root Ball Level and Centered
A plant that is potted off-center or at an angle is likely to lean later. Before backfilling completely, check the root ball from all sides.
The top of the root ball should be level. If one side sits lower, lift the plant and adjust the soil beneath it rather than trying to hide the tilt with extra soil on top. Aim for an even gap between the root ball and the pot wall all the way around.
Do not bury the trunk or stems deeper to make the plant feel stable. This can trap moisture against tissue that should remain above the soil and may cause rot. Keep the original soil line close to where it was before.
Firm the Soil Enough to Prevent Leaning
Loose soil leaves gaps that let the plant shift after watering. Overly compacted soil reduces airflow and can hold too much water. The goal is firm, not hard-packed.
Add soil in layers. Use your fingers, a trowel handle, or a blunt stick to work mix into gaps around the root ball, especially low on the sides. Press gently around the perimeter and check that the plant remains upright.
For very large pots, tamp lightly with your hands. Do not stomp, pound, or compress the mix into a solid mass. The plant should not rock when nudged gently, but water should still move through the soil.
If the plant keeps leaning, stop and correct the cause. The root ball may be uneven, the plant may be off-center, or the pot may be too light.
Stabilize and Care for the Plant After Repotting
After repotting, water thoroughly until water drains from the bottom. This settles the mix and reveals low spots. Let excess water drain completely, then empty the saucer or cachepot. If the soil level drops, add more mix around the root ball without covering the crown or burying the stem deeper.
Place the plant where it can recover without extra stress. Bright, indirect light is usually safer than harsh direct sun immediately after repotting. Avoid cold drafts, heat vents, sudden outdoor exposure, and frequent moving.
Wait to fertilize until the plant shows signs of settling in and active growth resumes, unless you are already using a very mild routine suited to that plant.
Watch for:
- Wobbling when the pot is moved
- Leaning that worsens after watering
- Wilting that does not improve when soil moisture is corrected
- Excessive yellowing
- Soil sinking away from the sides
- Water pooling or draining too slowly
Some droop is normal after repotting, especially if roots were disturbed. Severe or worsening wilting may mean roots were damaged, the plant is too wet or too dry in pockets, or the recovery location is too stressful.
When to Stake a Newly Repotted Large Plant
Staking is useful when a plant cannot stay upright while new roots grow into the fresh mix. It is temporary support, not a sign that the repot failed.
Stake the plant if:
- The root ball rocks in the pot
- The trunk or main stems lean after watering
- The canopy is heavy compared with the root system
- A climbing plant needs a pole or trellis
- The plant was unstable before repotting
Use a sturdy stake, bamboo pole, moss pole, or support that reaches deep enough into the pot to hold. Insert it near the root ball, avoiding the densest roots when possible. Tie the plant loosely with soft ties, leaving room for slight movement and stem growth.
For very large plants, two or three stakes around the root ball may work better than one central stake. The goal is to prevent tipping, not to immobilize the plant completely.
How Long It Takes a Large Plant to Settle
A large plant may take several weeks to several months to feel firmly anchored after repotting. Recovery depends on the species, season, root disturbance, pot size, and growing conditions.
Plants repotted in spring or early summer usually settle faster than those repotted in winter. Plants moved with most of the root ball intact recover faster than those that needed heavy root pruning.
During the settling period:
- Keep watering consistent, not excessive.
- Rotate gradually only if the plant is leaning toward light.
- Avoid heavy pruning unless imbalance is causing tipping.
- Do not keep pulling on the stem to test stability.
- Check stakes and ties every couple of weeks.
If the plant remains very unstable after a month or two, reassess the setup. The pot may be too light, the root ball may be too high, the soil may have settled unevenly, or gaps may remain around the roots.
Conclusion
Repotting large plants without making them unstable is mostly about balance and restraint. Choose a pot that is only moderately larger, wide enough, heavy enough, and properly drained. Keep the root ball as intact as possible, center it carefully, and set it at the same depth as before.
Backfill with a breathable mix and firm it enough that the plant does not rock. After repotting, water thoroughly, let the mix settle, and use temporary support if needed. A large plant does not have to stand perfectly on its own the same day; with the right foundation, it can re-anchor gradually.
FAQ
Should I repot a large plant into a much bigger pot to make it stable?
Usually, no. An oversized pot can hold too much wet soil and may leave the root ball sitting loosely in the mix. Choose a pot only a few inches wider, but heavier, broader at the base, and properly drained.
How do I stop a large plant from leaning after repotting?
Check whether the root ball is centered and level. If it was planted at an angle, reset it. If the soil has settled, add mix around the sides and firm it gently. Also make sure the pot is heavy and wide enough. If needed, stake the plant while roots grow into the new mix.
Also consider light. Some plants lean because they are reaching toward a window, not because repotting failed.
Is it okay to stake a large plant after repotting?
Yes. Staking is often helpful after repotting, especially if the root ball was disturbed or the canopy is heavy. Use soft ties and avoid tying tightly. Remove or loosen the stake once the plant is stable, unless it is a climbing plant that naturally needs support.
Should I water a large plant immediately after repotting?
In most cases, yes. Watering settles soil around the roots and confirms that drainage works. Water until excess drains from the bottom, then empty the saucer or cachepot. If the mix sinks, add more around the root ball without burying the stem deeper.
You Might Also Like