Should You Put a Gravel Layer in Pots Before Soil?
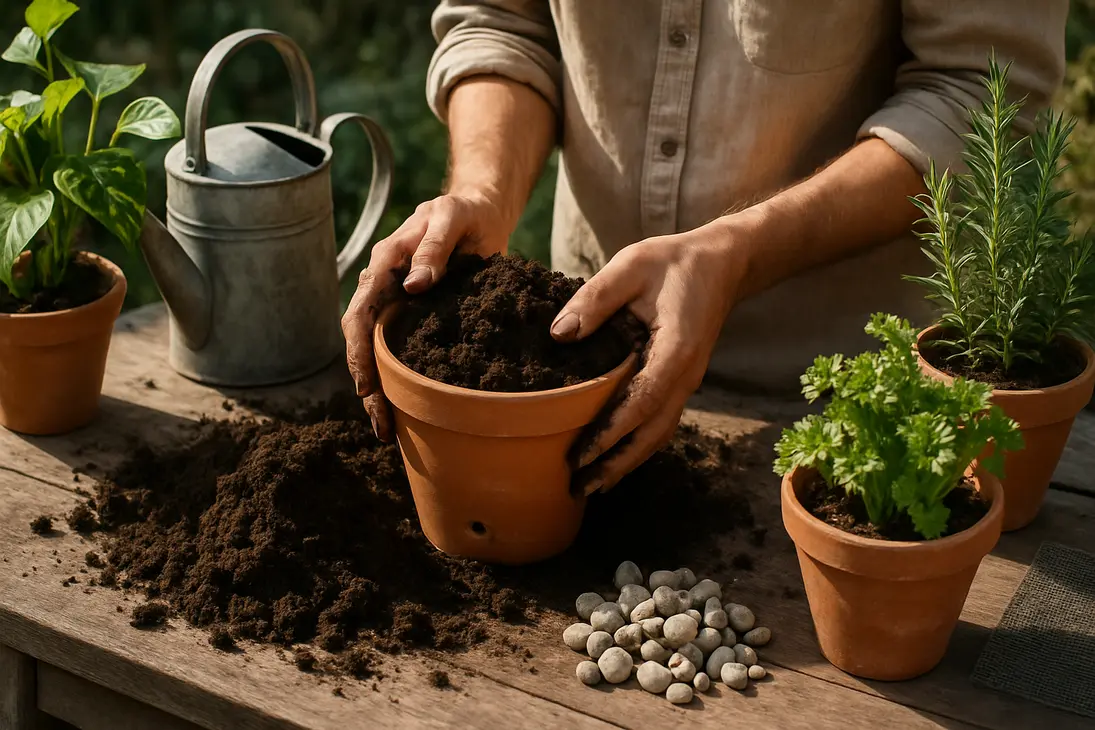
The Short Answer: Skip the Gravel Layer
In most plant pots, you should not put a gravel layer in pots before adding soil. It is an old container-gardening habit, but it usually does not improve drainage. In many cases, it makes the root zone wetter by moving the wettest part of the potting mix higher in the container.
For healthy container plants, focus on:
- A pot with drainage holes
- A suitable potting mix, not garden soil
- Enough soil volume for roots
- Thorough watering followed by draining
- A pot size that matches the plant
Gravel, stones, broken brick, and packing peanuts seem helpful because water moves through them easily by themselves. But in a pot, water behaves differently where fine potting mix meets coarse material. Water tends to stay in the smaller pores of the mix until the mix is wet enough for gravity to pull more downward.
The better solution is a free-draining potting mix in a pot that lets excess water escape.
Why Gravel in the Bottom of Pots Can Cause Problems
Clean gravel is usually not toxic. The problem is how it changes the usable root zone and how water sits inside the pot.
A container has a bottom. After watering, some water drains out, but some remains held in the potting mix. That retained moisture is normal. Trouble starts when too much of the mix stays wet for too long.
A gravel layer does not create a true drainage reservoir. It reduces the amount of potting mix available to roots and can raise the wettest layer of soil.
Gravel Does Not Pull Water Out of Potting Mix
The common assumption is that gravel acts like a drain. Since gravel has large spaces between particles, people expect water to leave the potting mix quickly, enter the gravel, and flow out of the drainage hole.
But potting mix holds water in small pores between peat, coir, compost, bark, perlite, and similar ingredients. Water clings to those fine spaces. When fine material sits on coarse material, water does not automatically leave the fine layer just because gravel is underneath.
Think of a damp sponge sitting on pebbles. The sponge does not instantly release all its water. Potting mix behaves similarly. Gravel may be open and airy, but it does not suck moisture out of the soil above it.
It Can Raise the Wettest Part of the Pot Closer to the Roots
After watering and draining, the lower part of the potting mix is usually the wettest. This retained zone is often called a perched water layer. Its depth depends on the texture of the mix, but the principle is the same: some water remains in the mix above the bottom of the container.
When you add gravel, you raise the bottom of the potting mix. The wettest part now forms above the gravel instead of at the true bottom of the pot. That can place wetter, lower-oxygen soil closer to the roots.
This matters most for plants that dislike “wet feet,” including succulents, cacti, Mediterranean herbs, and many houseplants prone to root rot. Roots need both water and oxygen. When potting mix stays waterlogged, oxygen is pushed out of the pore spaces, and stressed roots become more vulnerable to decay.
Gravel can also make watering harder to judge. The surface may feel dry while the lower root zone remains wet, leading you to water again too soon.
It Takes Up Space Better Used for Potting Mix
Every inch of gravel is an inch roots cannot use well. Gravel provides little plant-available moisture, no meaningful nutrition, and poor support for fine roots.
In a small houseplant pot, this can remove a large share of the root zone. A 6-inch-deep pot with 2 inches of gravel has lost about a third of its usable depth.
Gravel also adds weight, complicates repotting, and can give a false sense that drainage has been fixed. If the mix is too dense, the pot has no drainage hole, or the plant is overwatered, rocks at the bottom will not solve the problem.
What to Do Instead for Better Drainage
Better drainage is not about creating an empty space at the bottom. It is about balancing water, air, and root volume throughout the whole container.
For most potted plants, drainage improves when you choose the right pot, use an appropriate potting mix, avoid compaction, water thoroughly, and let excess water leave.
Use a Container With Drainage Holes
A drainage hole is the most important feature of a functional plant pot. Without one, excess water has nowhere to go. Even careful watering can eventually create soggy conditions in a sealed container.
For small and medium pots, one clear drainage hole may be enough. Larger planters often benefit from several holes across the base. The goal is to let excess water escape after the mix has been fully moistened.
If you love a decorative pot with no hole, use it as a cachepot. Keep the plant in a plastic nursery pot with drainage holes, set that inside the decorative container, and remove it to water or empty the outer pot afterward. Do not rely on gravel in a sealed pot.
Choose a Well-Draining Potting Mix
Good drainage starts with the mix. Garden soil is usually too dense for containers. It can compact, drain slowly, and shrink away from the pot sides when dry. A proper potting mix is lighter and designed to hold both moisture and air.
Choose the mix for the plant:
- Succulents and cacti: Use a gritty, fast-draining cactus or succulent mix. Add pumice, perlite, or coarse mineral material if needed.
- Most foliage houseplants: Use a quality indoor potting mix. For plants that like extra air, such as many aroids, add orchid bark or perlite.
- Herbs in pots: Use a free-draining mix. Rosemary, thyme, and lavender usually prefer leaner, airier soil than basil or parsley.
- Outdoor annuals and vegetables: Use a container mix that holds enough moisture for hot days while still draining freely.
Well-draining does not mean bone-dry. The aim is a mix that wets evenly, then gradually dries while allowing oxygen back into the root zone. Firm it gently around roots, but do not pack it tightly.
Water Thoroughly, Then Let Excess Drain
Light, frequent splashes often cause more trouble than deep watering. Shallow watering wets only the surface and makes it harder to know what is happening lower in the pot.
For most potted plants, water until the mix is evenly moist and excess water drains from the holes. Then let the pot drain fully. If it sits in a saucer, empty the saucer after dripping stops, especially for plants that dislike constantly wet roots.
Do not water on a rigid schedule. Check the mix. Many houseplants can be watered when the top inch or two feels dry. Succulents often need to dry much deeper. Moisture-loving plants may need water sooner, but they still should not sit in stagnant water unless adapted to boggy conditions.
Signs a pot may be staying too wet include:
- Yellowing lower leaves
- Wilting while the mix is damp
- Soft stems
- Fungus gnats
- Sour or swampy smell
- Brown, black, or mushy roots
These symptoms can have multiple causes, but they are a reason to check drainage, pot size, and watering habits.
Avoid Oversized Pots for Small Plants
A bigger pot is not always better. When a small plant sits in a large container, the extra potting mix may stay wet because there are not enough roots to use the moisture.
For many houseplants, repotting into a container just one size larger than the current root ball is enough. Outdoor planters and fast-growing vegetables may need more room, but the same idea applies: match the pot to the plant’s roots, growth rate, and water needs.
Oversized pots are especially risky for succulents, young cuttings, small tropical plants, and plants recovering from root damage. A gravel layer will not fix the imbalance.
Should You Cover Drainage Holes With Gravel?
You usually do not need to cover drainage holes with gravel. A few stones may stop some mix from falling out at first, but they do not meaningfully improve drainage. In small pots, even that small layer can reduce root space.
It is normal for a little potting mix to wash out during the first watering after repotting. Once the mix settles and roots grow, soil loss usually slows. If the hole is very large, use a thin barrier that lets water pass through.
Good options include:
- Plastic or fiberglass mesh
- Window screen
- A coffee filter
- A loose shard of broken pottery
- A paper towel for temporary use while potting
The barrier should sit loosely. Do not seal the hole. The goal is only to keep mix inside while allowing water to leave. For many pots, the simplest choice is to leave the drainage hole uncovered and accept a little initial soil loss.
When Gravel or Pebbles Can Still Be Useful
Skipping a gravel layer does not mean gravel has no place in container gardening. It can be useful when it is not being used as a buried drainage fix.
The key distinction: gravel is usually a poor bottom layer beneath potting mix, but it can be helpful as decoration, ballast, or part of a setup that keeps pots above standing water.
As a Decorative Top Dressing
Pebbles, gravel, crushed stone, or decorative grit can be used on top of the soil for appearance. A top dressing can make a container look finished, reduce splashing, and keep lightweight potting mix from shifting.
This is common for succulents, cacti, bonsai-style displays, and modern indoor planters. Use a thin layer. Avoid piling stones deeply around stems or crowns, because trapped moisture can encourage rot in sensitive plants.
Top dressing can also slow evaporation from the surface. That may help some plants and hurt others. If you use pebbles on a plant that prefers dry conditions, check the soil below the stones before watering.
Rinse decorative stones before use so dust and fine particles do not wash into the mix.
In a Humidity Tray Below the Pot
Pebbles can be useful in a humidity tray if the pot sits above the waterline. Place pebbles in a shallow tray, add water below the top of the pebbles, and set the pot on top. As water evaporates, it may slightly raise humidity immediately around the plant.
This will not turn a dry room into a greenhouse, but it can help humidity-loving plants a little.
The bottom of the pot should not sit in water. If water touches the drainage holes, the potting mix can wick moisture upward and stay too wet. Keep the water below the pebble surface and refresh the tray regularly.
For Weight or Stability, Used Carefully
Gravel can add weight to a container, which may help tall, narrow pots or top-heavy plants. Outdoor planters in windy spots may also need extra stability.
Use this carefully. Gravel inside the planting pot still reduces root space and may create the same perched-water issue. It is often better to add weight outside the root zone.
Better options include:
- Setting a nursery pot inside a heavier cachepot
- Choosing a wider, heavier container
- Placing stones or bricks around the outside base
- Adding weight to an outer pot, then setting a draining inner pot above it
If you must use gravel in the bottom for stability, keep the layer shallow and make sure the plant still has enough potting mix for healthy roots. Treat it as a compromise, not a drainage improvement.
Conclusion
A gravel layer in pots is usually unnecessary and can make drainage worse. Gravel drains quickly by itself, but it does not pull water out of potting mix. Instead, it can raise the wettest part of the root zone and take up space roots could use.
For healthier container plants, use pots with drainage holes, choose the right potting mix, water thoroughly, let excess water drain, and avoid oversized pots for small plants.
Gravel still has limited uses as a decorative top dressing, in a humidity tray, or as carefully placed weight. But if a pot stays too wet, fix the container, mix, or watering routine rather than hiding the problem under rocks.
FAQ
Does gravel at the bottom of a pot help drainage?
No. Gravel at the bottom of a pot does not draw excess water out of the potting mix. Water is held in the small pores of the mix and may remain above the gravel until the mix is saturated enough to drain.
This can leave the wettest part of the soil higher in the container, closer to the roots. A drainage hole and suitable potting mix are much more effective.
What can I put in the bottom of a planter instead of gravel?
In most cases, put potting mix in the bottom of the planter. The plant benefits from the extra root space.
If you only need to keep soil from falling through a drainage hole, use a thin, water-permeable barrier such as mesh, window screen, a coffee filter, or a loose piece of broken pottery. Do not create a thick layer. If the planter is very deep, consider using a smaller draining inner pot inside it.
Is it okay to put rocks on top of soil in potted plants?
Yes. Rocks or pebbles can be used as a decorative top dressing if they suit the plant and do not trap too much moisture around stems. Use a thin layer and check the soil underneath before watering.
Top dressing is different from a gravel drainage layer. Pebbles on top may affect surface drying, but they do not create the same buried interface problem as gravel under the potting mix.
What should I do if my pot has no drainage hole?
Use it as a decorative outer pot. Keep the plant in a nursery pot with drainage holes, set it inside the decorative container, and remove it for watering or empty collected water afterward.
If you plant directly into a pot with no drainage hole, water very cautiously and expect a higher risk of root rot. A gravel layer will not solve the problem because excess water still cannot leave the container. For long-term plant health, a drainage hole is strongly preferred.
You Might Also Like